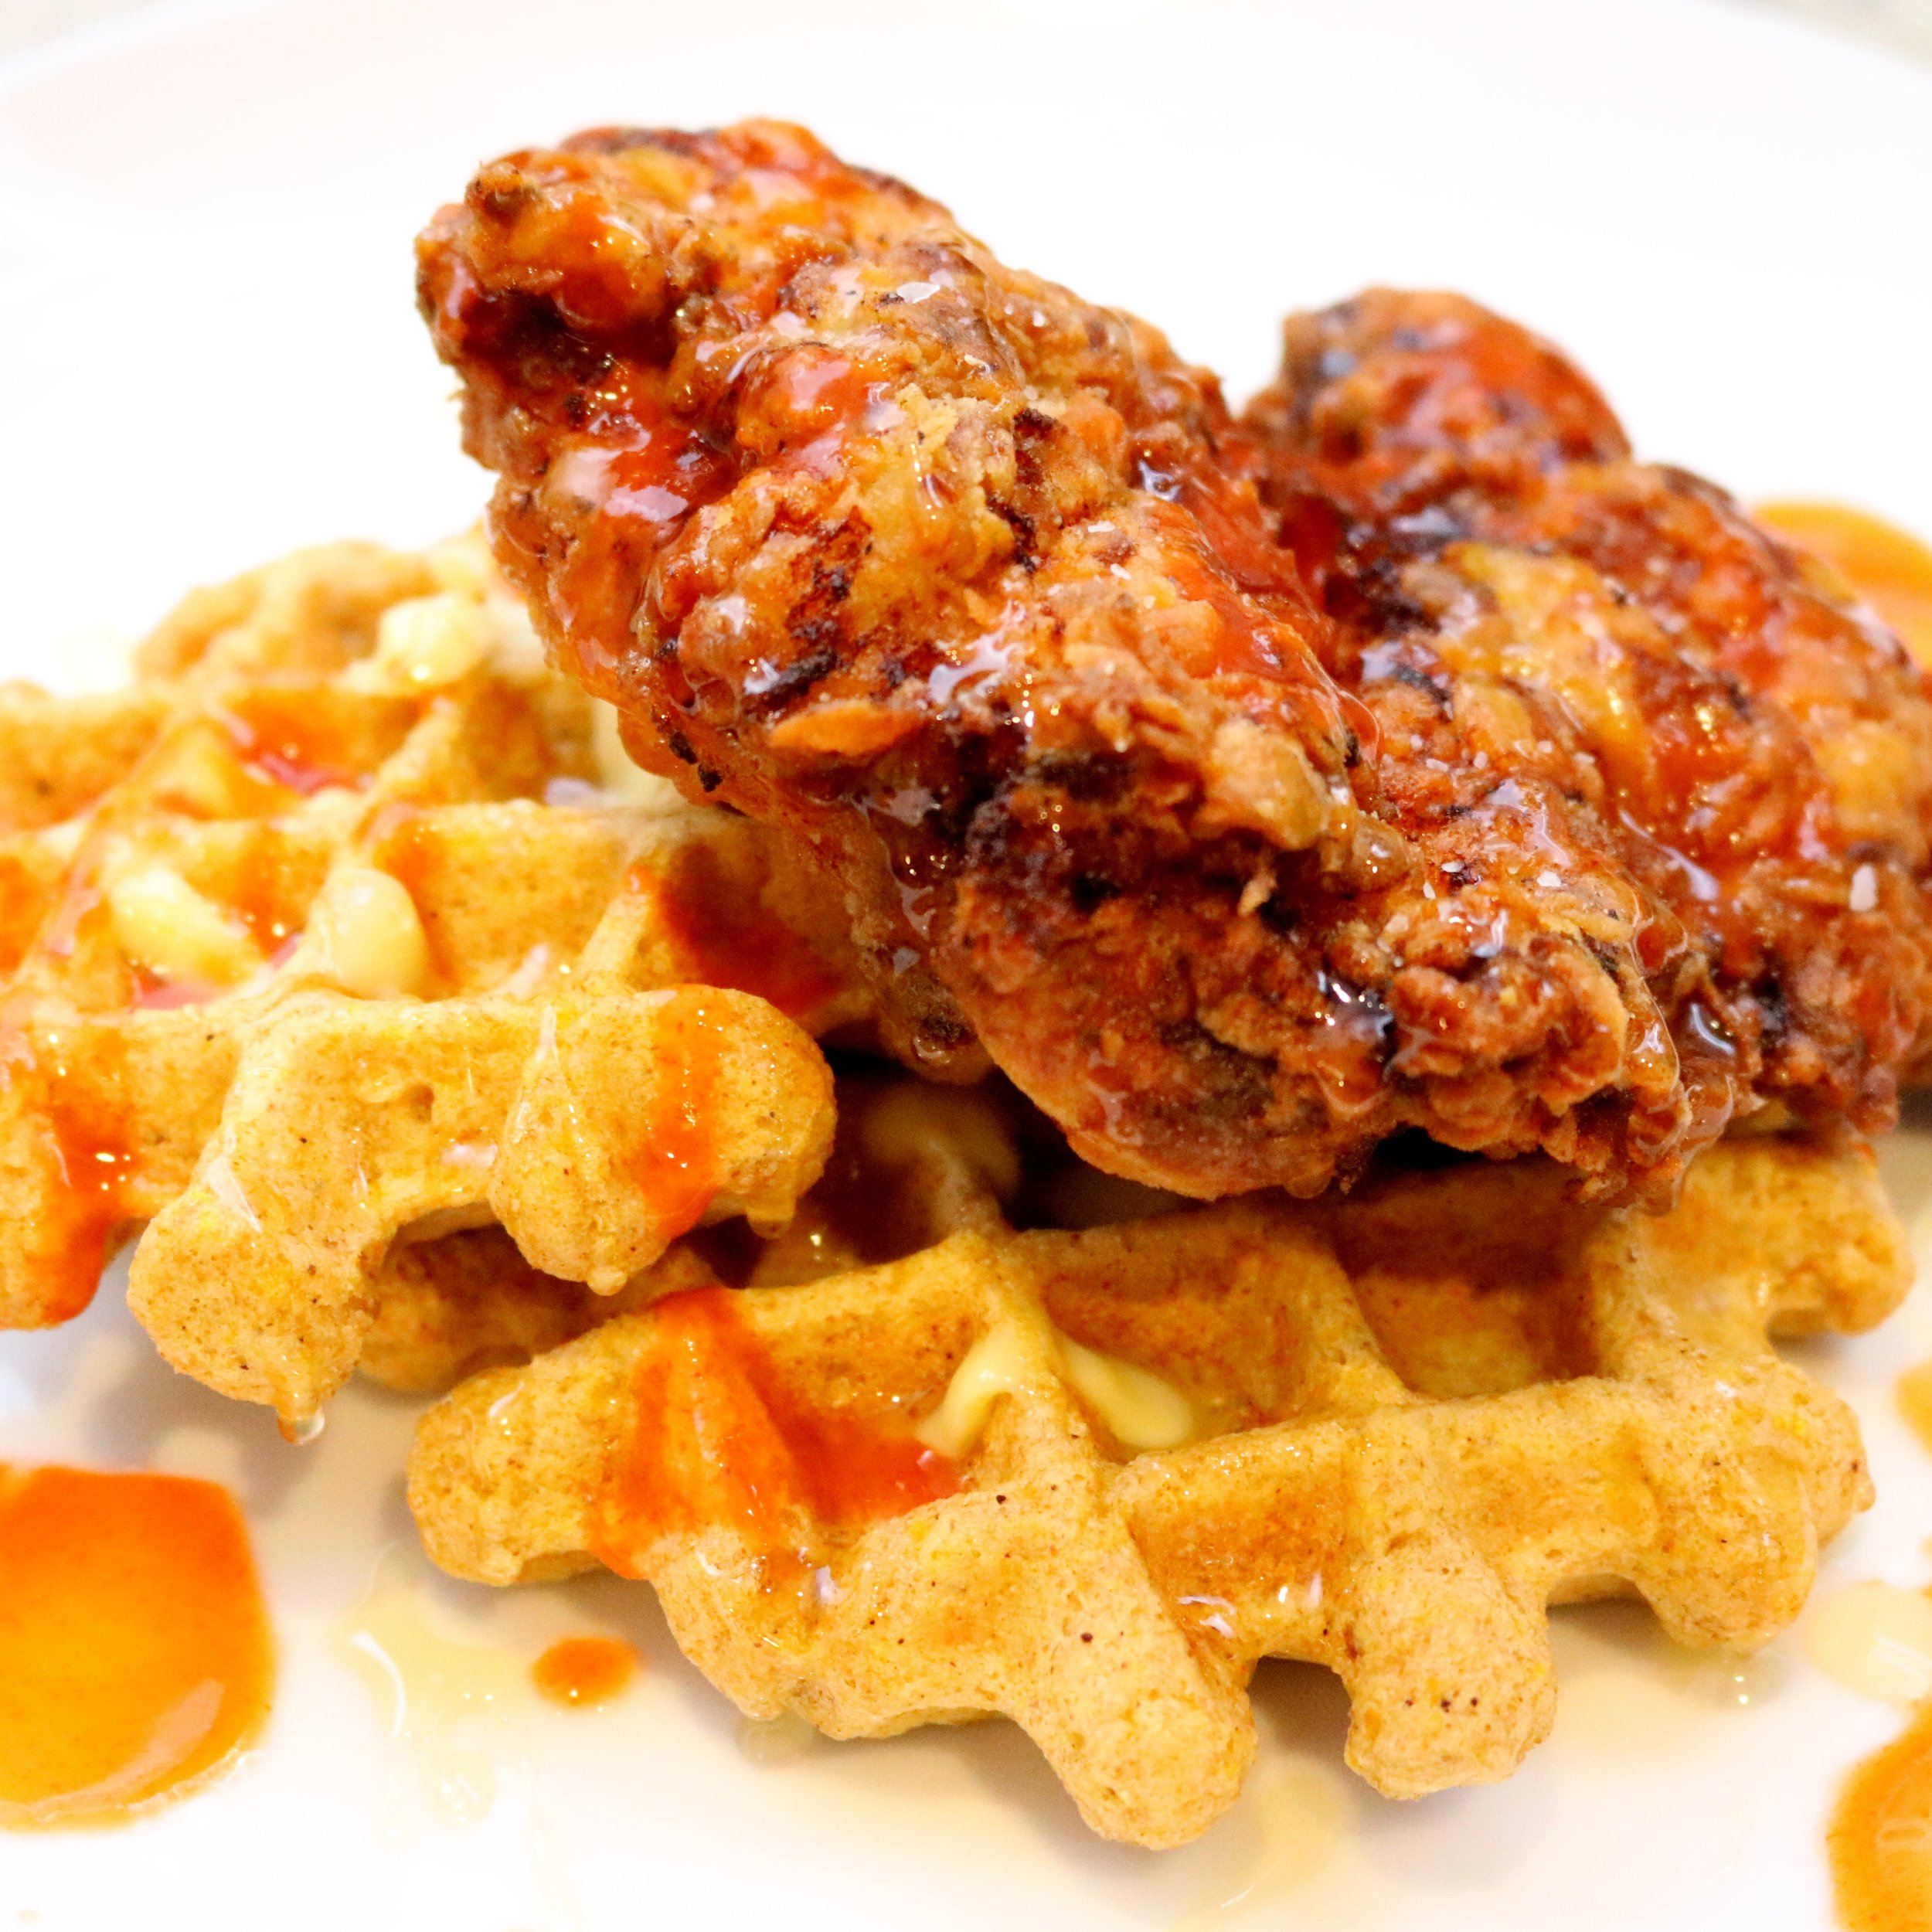
Jeff's Fried Chicken Fingers
After a lot of hard work, and eating far too much fried chicken, we’re providing an updated recipe and technique for our fried chicken. This method has a lot more flavor packed in the batter and it seems to adhere much better to the chicken. Our older recipe still holds up, but we think this version is the bees’ knees.
Ingredients
Up to 3 lbs chicken tenderloins (or chicken breasts cut down to chicken “finger” size)*
Dutch oven
Cooking oil (sunflower oil is preferred, but canola/vegetable would work as well; enough to fill the Dutch oven to about 2 inches in depth)
Instant-read thermometer
For the batter:
1 1/2 cup buttermilk
1 cup all-purpose flour**
1 egg
1 1/2 teaspoon kosher salt
1 teaspoon fresh ground black pepper
1 teaspoon Kashmiri chili powder***
1 teaspoon smoked paprika
1/2 teaspoon dried oregano (Mexican oregano, preferred)
1/2 teaspoon ground cumin
1/2 teaspoon dried parsley
1/4 teaspoon onion powder
6-8 dashes hot sauce (Louisiana-style, such as Crystal’s is recommended)
For the breading (for each 1.5 pound of chicken):
1 cup all-purpose flour**
1 1/2 teaspoon kosher salt
1 teaspoon fresh ground black pepper
1 teaspoon Kashmiri chili powder***
1 teaspoon smoked paprika
1/2 teaspoon dried oregano (Mexican oregano, preferred)
1/2 teaspoon ground cumin
1/2 teaspoon dried parsley
1/4 teaspoon onion powder
Instructions
Combine all the ingredients for the batter in a bowl and mix well. Transfer into a zip top bag (or a shallow dish, if you prefer). Add the chicken to the bag and combine with the batter. Seal and refrigerate for at least 2 hours and up to overnight (overnight preferred).
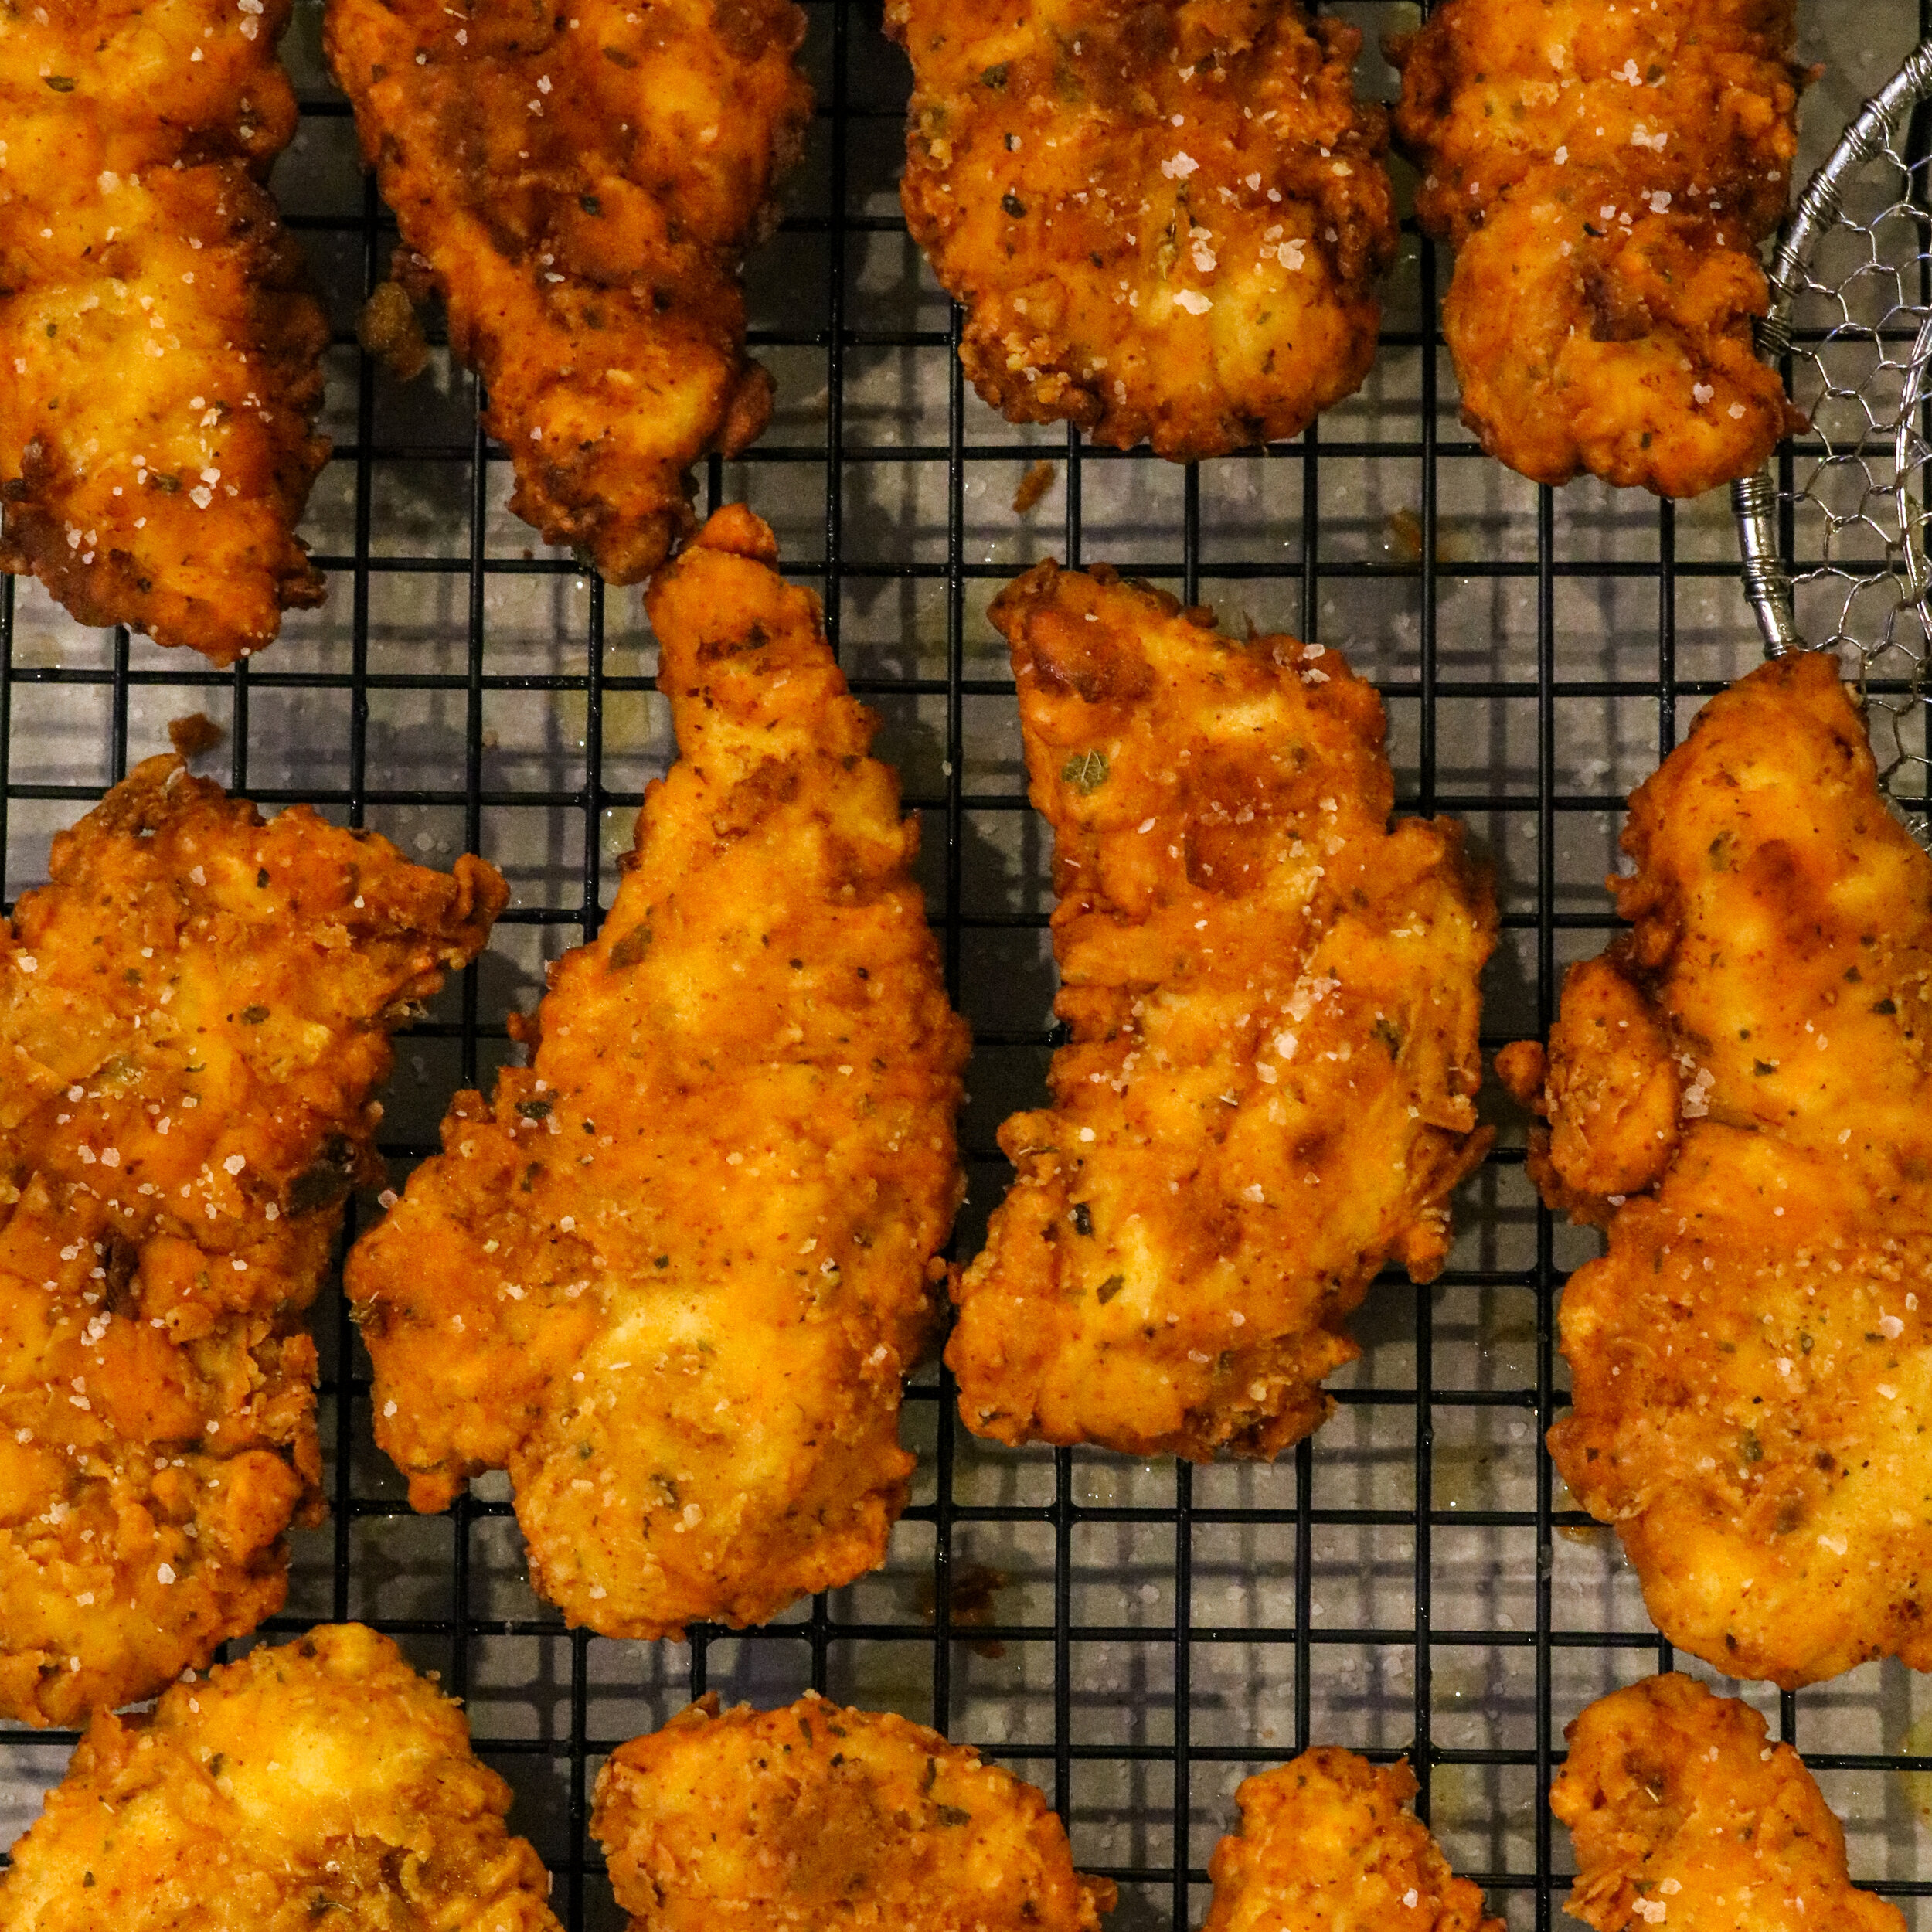
After the chicken has set up with the batter for at least two hours, mix together the breading in a shallow dish. Prepare a baking sheet with a cooling rack. Remove the chicken from the refrigerator and dredge one tenderloin at a time through the breading (ideally, take the chicken directly from the bag, set it into the breading, loosely cover the top of the chicken with the breading, and then lightly pressing downward; flip over and repeat in the breading). Move the breaded chicken onto the prepared rack. Repeat with the remainder of the chicken.
Allow the breaded chicken to rest on the rack at room temperature for 20-30 minutes. This step is necessary in order to allow the breading to really adhere to the chicken. Meanwhile, begin heating your cooking oil in the Dutch oven over medium-high heat and prepare a second baking sheet with a cooling rack (for the finished chicken). The oil should be around 350°F when ready to fry, and a small bit of extra batter tossed into the oil should begin to fry up quickly.
Cook the breaded chicken in batches of about 4 tenderloins at a time in the hot oil. Fry for approximately 4-5 minutes, turning the chicken over about halfway through. Remove the chicken from the oil and place on the prepared rack to rest. Sprinkle with a bit of kosher salt while still hot (to taste). The finished chicken should read 165°F on an instant read thermometer.
We recommend allowing the final batch of chicken to rest for about 5 minutes before serving. Don’t worry about it cooling down too much, we find that even the first batch of chicken is still warm by the time we get around to eating!
Notes
*We like to use chicken tenderloins in this recipe, but you can also use bone-in pieces or boneless thighs, etc. You’ll just need to lengthen the fry time a bit, still aiming for that final internal temperature of 165°F.
**While we use all-purpose flour here, you can easily substitute in gluten-free corn flour in order to make this dish gluten-free.
***We really love the flavor and heat that you get from Kashmiri chili powder. If you have a more mild chili powder in your kitchen, we recommend adding an additional 1/4 to 1/2 teaspoon of cayenne pepper to each the batter and breading mixtures for a bit more kick.